Wednesday, December 19, 2018

How to Apply for UKRN


***Updated regularly as I go through the process

If you are planning to work as a UK RN and you are basically winging everything by yourself without the full support of an agency, this step by step guide is for you.

You might ask why I am DIY-ing everything, it is because I have minimal hospital experience.

Agencies here in the Philippines are a bit more strict when it comes to hospital experience so I opted to go with an agency based in the UK. According to the new NMC update, starting on 25 September 2018, nurses can now apply even if you have not completed 12 months registered practice.

Keep all your receipts for every step of the way as some agencies and Trusts offer refunds.


  1. Take the IELTS for UKVI Academic and get a band 7 for Listening, Reading, and Speaking and a 6.5 for Writing. You can register at the British Council or with IDP. Tests are held in Cebu and Manila and this will set you back Php 13,885.00. (If you want a personal tutor, I can do so via Skype as I got a band 9 on almost all of the categories. ) If you fail this, you can take the ordinary IELTS Academic next time.
  2. Register with the Nursing and Midwifery Council (NMC). Fresh grads with no hospital experience are also accepted.
  3. Register with Pearson VUE. Select Nursing and Midwifery Council (NMC) for the type of exam. A username and temporary password will be sent to you in two separate emails. 
  4. Book for your Computer Based Test (CBT) at Pearson VUE. Exams in the Philippines are available in Cebu and Manila in these locations:
    • MISNet Education Inc. - Cebu City (Unit 401 Don A.Gothong Centre (Sugbutel) Sergio Osmeña Boulevard North Reclamation Area Cebu City Philippines
    • MISNet Education, Inc. - Makati City (Unit 2201 Antel Corporate 2000 Centre 121 Valero Street Salcedo Village 1227 Makati City Manila Philippines )
    • Pearson Professional Centers-Manila, Philippines (27th Floor, Trident Tower 312 Senator Gil Puyat Avenue, Makati City, 1227 Manila Philippines)
  5. Study for your CBT! Previous test takers say two weeks to a month preparation is enough. They swear by the following review materials which are floating around online especially on Facebook:
    1. The Notebook by Karen Faye
    2. The Royal Marsden Clinical Nursing Procedures
  6. nn

Monday, October 8, 2018

Things to Do in Geneva in One Day or Less


Bonjour!

Geneva, Switzerland can easily be explored in one day or less! You can even see all of it in a few minutes by crossing to France! Do you want to know how? Read on!

Geneva or Geneve is more expensive than your average European country. They use Swiss Francs or CHF not Euros. I discovered that the best way to get this money changed without charges is to do this in the Information Center. In fact, the Information Center is your best friend. While in Cointrin Airport or the Geneva International Airport, locate the Information Center and do these things:
  1. Get a Geneva One Day Pass
  2. Get a free transport pass or ticket. To get from the airport to the place you are staying in Geneva, you can actually get a free ticket that is good for 80 minutes. This can be used for buses, trams, trains and yellow taxi-boats locally known as Mouettes as well. Once you arrive at your accommodation, you can request from the reception for a free non-transferrable Geneva Transport Card. This is good for the entire length of your stay in that hostel or hotel and it can be used in the whole public transportation system.
  3. Inquire on the logistics to the places you want to see.
  4. Change your Euros into CHF.
Now that you have the aforementioned in place, deposit your stuff in the luggage storage at these two main locations:
  1. Geneve Aeroport or Geneva Airport
  2. Geneve or Gare Cornavin - main train station
Automatic luggage prices depend on the size of your luggage and storage time. Initial prices cover for the first six hours. Please refer to this link: http://www.geneva.info/luggage-storage/


If your luggage does not fit the automatic lockers dimension, you can check out the luggage counter operated by a human being. 

Take advantage of the free internet and download the following transportation apps to help get you around:
  1. Geneva Public Transport (Unireso) route planner: TPG for real-time updates of the next tram or bus coming to your stop, connections and traffic info.
  2. SBB Train journey planner: SBB
  3. Google map of Switzerland. The best thing about this is it has transportation instructions!
You might want to use the WC (that's CR for us Pinoys), just prepare 1CHF. I know right! I thought that since it is a first world country it should be free!

Now, let's begin exploring Geneve! Once you get off the train in the main station of Geneve, the adventure begins! Just right across the train station is a Starbucks. Just follow this street and on your stroll, feast your eyes on luxury flagship stores and cars! Yep, I have definitely not seen these in the streets of Tacloban.


Keep on walking until you find yourself on a bridge with colorful flags. 

On your right is a short flight of stairs. It will take you to a closer view of giant white floating animals with wings and webbed foot. They are so cute but beware of their humongous poop that litters the footpath!


You can also get to appreciate this view here:


Following this little path will take give you an unobstructed view of the iconic  Jet D’eau and Lake Geneve shoreline/seascape/lakefront. You can also spot the yellow taxi-boats or Mouettes and white tout boats plying the waters as birds dart to and fro.
The Jet D’eau ejects 140 meters into the air and it can be seen even in the mountain tops of neighboring France! It is the world's tallest and screams to the world that Geneva is at the forefront of hydraulic power. Lake Geneve or Lac Leman, on the other hand, is the best place to take a stroll. If you just follow the main bridge, it will take you to the eastern bank where you can find a  giant Flower Clock or L'horloge fleurie. The flower here changes each season.

Then, head on to the Old Town and enjoy its cobblestones and historical places like the following:

  1. Bourg-de-Four. Oldest public square which is surrounded by pubs and restaurants.
  2. Hotel De Ville. Known as the city hall and the seat of the government.
  3. Old Arsenal. This former battery is located right across the Hotel De Ville. Today, it exhibits a mosaic done by Alexandre Cingria in 1949 that depicted Caesar's arrival in the city in 58 BC.
  4. Bastions Park. On its entrance is a giant chess board. The Reformation Wall can also be found in its vicinity.
  5. Reformation Wall. This monument at the Bastions Park shows of the prominent figures of the Protestant Reformation namely  Guillaume Farel, Jean Calvin, Théodore de Bèze and John Knox.
  6. Russian Church. Completed in 1866 by Russian expatriates with a distinct Byzantine architecture.
  7. Treille Promenade. Once an artillery post, today this rampart wall offers visitors a beautiful view of the city.
  8. Passage des Degrés-de-Poules. This is a very long and narrow staircase with 67 steps leading to the St. Peter's Cathedral. 
  9. St. Peter's Cathedral. This is the oldest architectural treasure of the city. Jean Calvin once preached here. During good weather, choose to climb the South Tower because it has an open-air balcony and a direct view of the lake. Meanwhile, the North Tower is a wooden room with closed windows and is best to use during rainy days. It offers another beautiful view of the city.  The towers are connected by staircases and corridors that allows you to appreciate the Cathedral's rooftop, original stone walls, and heavy wooden plates. You can climb the tower for free with your Geneva Pass or pay 5CHF. There is also an Archaeological Museum, Musée International de la Réforme, or International Museum of Reformation, Museum of Art and History on-site. 
  10. Clock Tower. Every hour, the clock plays the glockenspiel or the Swiss National Anthem. Located below the clock is a statue of Philibert Berthelier, hero of Genevas independence and his pet ferret.
From here, you can head on to the United Nations at the Palais des Nations, Avenue de la Paix. They usually open at 10:00 and closes at 16:00. Just bring your passport with you. Price is 12CHF for adults and 10CHF for students.

Lastly, take a bus to Etrembieres, France where Mount Saleve is located. It will just be a 10-minute easy walk!

You will find yourself crossing into a nicely kept modern community that ends in a parking lot. Once you spot the Baby Saleve téléphérique you know you are in the right spot.
Protection issues. I know!
A roundtrip ticket will cost you 11.90 euros or 14.50 CHF.


Take a téléphérique or cable car to its peak with an altitude of 1,380 meters above sea level. From here you will be able to appreciate the alpine peaks that border Switzerland, Jura mountains and Mont Blanc. The city center of Geneve is just 20km away! You can even see the Jet D’eau and Lake Geneve while enjoying a snack at the cafe.


There are also trails you can enjoy here or if you have plenty of time, parasail and have a literal bird's eye view of the city!

A 20 minute tandem jump with an instructor will set you back CHF 180 if you book with the Swiss paragliding club and by the French paragliding club for CHF 120.
By the way, there is a free 3 hours walking tour that starts at 11am every day at the Tour de l'Ile, Pont de l’Ile at Place Bel-Air. The tour covers Place Neuve, Old Town, Reformation Wall, St Peter’s Cathedral, ICRC First Headquarters, City Hall, Place du Molard, the Flower Clock and the Jet d'Eau.

Wednesday, September 12, 2018

Switzerland Schengen Visa Application for Filipinos


As of July 2018, TLSContact does not process the Switzerland Schengen Visa anymore. I learned a hard lesson on this. When you do a search for Switzerland Visa Philippines, TLSContact always pops up. I first filled out their online form and found it weird that their online appointment dates are all filled up. I then tried calling their call center but I did not receive a callback. We would also get the answering machine at the Switzerland Embassy. So I decided to fly out earlier and check out the TLSContact address, only to find out that it's already closed for business for good. Luckily, when my sister called the Switzerland Embassy, someone picked up and redirected us to VFS Global.

VFS Global is the external service provider handling the processing of Switzerland Visa now. They are in a separate location to the busy and crowded VFS Global in Ecoplaza Building. The Swiss VFS Global is now located on the 30th Floor The World Center Sen Gil J Puyat Ave Makati City, Metro Manila. It has a laidback and friendly environ. They even entertain walk-in applicants!

Visa's can be lodged as early as three months before the intended date of departure to a week before. The visa is then released after 5 to 10 working days after lodging. I got mine after six days. However, I do not advise you to do the latter because you might run out of time.

Visa application is on an appointment basis only so here is the flow on how to do this:
1. Login to  VFS website ( http://www.vfsglobal.ch/Switzerland/Philippines/ ) and create an account. you can also call the Visa Hotline (02) 790-4914, Mondays-Fridays, from 8:00am to 5:00pm except during public holidays.
2. Choose whether you are getting a tourist or business visa. Official travels, training, workshops, and seminars are under a business visa.
3. Pick a convenient schedule and print out the Appointment Letter.
4. Print out the checklist for the issuance of Schengen Visa according to your visa type.

  • Tourist Visa Requirements: http://www.vfsglobal.ch/Switzerland/Philippines/pdf/Checklist-For-Tourism-Document.pdf
  • Business Visa Requirements: http://www.vfsglobal.ch/Switzerland/Philippines/pdf/Checklist-for-Bussiness-Document.pdf

5. The visa requirements for both tourist and business are almost the same. Prepare the needed documents beforehand. Do not staple the papers. You will need the original and photocopy of the following visa requirements:

  • Visa Application form. A print out of the Visa Application form and completely and properly filled out and signed.
  • 2 Passport Photos. They ask for two but actually just need one. Paste (do not staple) this photo to your Visa Application form. The photo should comply with these requirements:
    • Must be a colour photograph printed on normal photographic paper
    • Should be passport sized 3,5 x 4,5 cm
    • Close up to your head and top of your shoulders so that your face takes up 70-80% of the photograph
    • Full face taken straightforward 30 - 36 mm from point of the chin to head of hair
    • Taken against a white background 
    • Without sunglasses
    • Without hat or other head covering unless you wear this for religious reasons
    • Spectacles should not have toned or reflecting glasses
    • The frame of the spectacles may not cover the eyes
    • The mouth must be closed

  • Valid passport. Photocopy the inside cover containing the holder's personal info and photo, the stamped pages, and the inside back cover containing "important reminders" and emergency contact details. 
  • Old passports. Photocopy the inside cover containing the holder's personal info and photo, the stamped pages, and the inside back cover containing "important reminders" and emergency contact details. If you've had a Schengen Visa before, inform the processor which page it is one. Do not bind the passports with staplers. Use rubber bands instead.
  • Photocopy of all visas. I've even photocopied my Israel, Hong Kong, and Macau visas.
  • For spouses or children (below 21 years old) of Swiss / EU / EFTA nationals, the following must also be submitted:
    • photocopy of the marriage contract (spouse), birth certificate (child), family book or any other document proving relationship, which must be issued by a Schengen / EU / EFTA member country. 
    • A copy of the family member’s passport and/or ID card must also be provided. 
  • If traveling with spouse and/or children: 
    • marriage contract 
    • birth certificate of the children
  • If employed: certificate of employment with leave of absence from the local company or organisation showing position, date of hiring, salary as well as date of return to work.
  • If self-employed: proof of business (DTI/SEC registration, income tax return, financial statements)
  • If still studying: proof of enrolment, leave of absence from school (if travelling while classes are ongoing) 
  • For foreign nationals who have valid residence status in the Philippines: 
    • one (1) copy of the Alien Certificate of Registration (ACR) 
    • Re-Entry permit
  • Proof of financial resources of the applicant: 
    • latest bank statements showing cash flow from the last 6 months with stamp/signature of Bank in original needs to be submitted on A4 size only. you will be submitting the original copy of this.
    • bank books
    • latest international credit card statements (last 6 months)
    • Income tax return
  • Signed Invitation by the business partner/official contact/host in Switzerland. This should contain the complete travel details arranged by the host company like: 
    • purpose
    • duration of stay
    • proof of travel and accommodation arrangements like hotel reservation and tickets for tours, shows or transportation
    • financial guarantee like 
    • day to day itinerary
  • Confirmed roundtrip air travel reservation. This is also known as mock ticket or fake ticket. You can get this done by a local travel agency for a small fee. I got mine at Viaje for 350php. Thanks Marj! There is no need for you to buy the real ticket.  If you get yours online, the minimum charge is 15USD. In Iraq, I got mine for free.
  • Detailed day-to-day itinerary of planned trip/schedule of activities. Mine looks like this:

  • If applicable, valid visa(s) for the country(-ies) of destination after leaving the SCHENGEN territory based on the planned itinerary.
  • International travel insurance. This can be purchased locally or in Switzerland. The coverage must be at least EUR 30’000.-- / USD 50’000.-- / PHP 2.5M to cover expenses for personal accident, urgent medical treatment, urgent admission in a hospital or urgent repatriation on medical grounds; with coverage including ALL Schengen member states). The validity period of the insurance coverage must be for the entire duration of the intended stay including entry and exit day of the Schengen area. I usually get mine from Tokio Marine or World Nomad. However, I recently discovered that it is so much cheaper (like 75% of the price I pay online) to get Standandard Insurance. They sell this at VFS Ecoplaza and I also saw this being sold at Viaje.
6. Be at VFS Switzerland Global (30th Floor The World Center Sen Gil J Puyat Ave Makati City, Metro Manila) 30 minutes early. Bring an ID to leave with the guard on the ground floor.
7. The receptionist at the VFS will give you a Queue Token Receipt and an SMS Solution-Application Form to fill up. This gives VFS the consent to send you updates regarding your visa application.
8. You will have to leave your bag at the lobby. However, you can bring your documents, wallet, and your phone in silent mode with you.
9. Once your number is called, you will submit it for checking.
10. Pay the Visa Fee of 3700USD.
11. You will be asked for the preferred passport collection process. This may be via courier or pick up. If you choose via courier, this will set you back 300php.
12. You will be ushered to another room for biometrics. Your picture and fingerprints will be taken.
13. Wait 5 to 10 working days for the SMS confirming or denying(hopefully not) your Schengen visa.
14. Go to VFS Switzerland from 14:00 to 16:00 Mondays to Fridays to pick up your document. Prepare the following documents when you pick up your passport:
  • Pick up by main applicant. Present an original valid ID and OR receipt.
  • If representative will pick up: authorization letter, VFS Receipt, Photocopy of valid ID of participant and original valid ID of representative.
The border authorities are obliged to examine if the prerequisites for entry no longer apply. If you are unable to provide relevant evidence like your letters of invitation and travel confirmations, you might be refused entry even if you are in possession of a valid visa.

Good luck and have fun in Europe!

***If you have applied for a Schengen Visa in the last 59 months you can opt to lodge it by post. Check out the instructions here.

Thursday, July 12, 2018

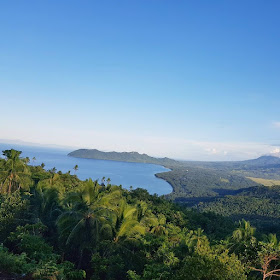
When in Hinunangan


Hinungan in Southern Leyte is a typical seaside town that is a 2.5 hours drive away from Tacloban City. It may be considered a third class municipality but most of the locals here are seafarers so the houses here look pretty nice and are fitted with the latest amenities. The locals speak Bisaya or Cebuano but can easily understand Waray.

Once unspoiled and only known to the locals, it is now slowly gaining popularity with Warays due to viral social media posts so better get there before it gets trashed like the other islands.

If you are wondering how this town is one of my favorite stomping grounds, it is because of my two best friends, Emma and Liza. Their paternal grandmother, the Maiz, hails from this once sleepy fisherman's town!

HOW TO GET THERE
Take a bus or van that is headed for Hinunangan, Southern Leyte. If you are coming from Ormoc City, it will take you about 4 hours to get here. Both of these modes of transportation will set you back 140php.

HOW TO GET AROUND
There are single motorcycles locally known as habal habal and motorcycles with sidecars. Both of these will cost you from to 10 to 20php depending on the distance.

WHERE TO EAT:
Carenderias or canteens can be found in the town center. It's basically homecooked food so you will also get a chance to sample the local fares.

WHERE TO GO:
1. Calag-itan Fish Sanctuary 
This is my personal favorite when I am with my best friends in Hinunangan! The best times to get here according to moi is during sunset because it's not hot plus I get to look at the island and just watch the smoke rising up from houses who are preparing their dinners snaking in between coconut trees! You will also get to see quarrel of sparrows heading home and other flocks of birds!

However, the highlight of any trip to this spot is definitely chasing the school of zebra fishes! Of course! Obviously! So when you're here bring snorkeling gears to make most of your time. There's a 10Php entrance fee and cottage rent ranges from 100-500Php.


2. San Pablo Island (Pong Gamay)
To get to any of the twin-islands, take a motorcycle to Brgy. Canipaan then, from there, take a common boat to any of the islands for . However, if you are traveling by group and wants the freedom to leave the island at your whim, just rent one for 1000Php. You can contact Kenneth at San Pablo Island.

Food and other commodities on these island barangays are limited so it is best to these basics with you. If you want to stay the night, there are rooms for rent and you can even pitch a tent! I bet the night sky is beautiful here considering there is little light pollution so enjoy stargazing with the one you love!

San Pablo is the smaller island but my favorite among the two. It has finer sand and the calm and clear water is perfect for snorkeling plus I do not really have to worry that I might step on some poor sea urchins! There is also a diving board for all you daredevils out there.


3. San Pedro Island (Pong Dako)
The bigger half of the twin-island but I consider this the rockier version. It is rich in sea urchins so you can buy them from locals to savor! You can even help out the local kids harvest them!


4. Pungkay Mountain Park
To get here, one must take a motorcycle ride from the town center then hike up the hill for around 15 minutes and pay a 10Php fee. This is a much shorter hike compared to Heart Shape. There are three stations although the first station with its Balinese inspired hut disappointed me. Why do we need to copy other countries architectural designs?

You can catch the sunrise here or the sunset but I think the sunsets here are more dramatic with all the different cloud formations and beautiful hues.

Sunrise.

A quick breather on the first peak.


Twin warrior pose at this Bird's Nest platform.

Check out the trail on the lower right of the photo.

Sun salutation to the setting sun.

5. Heart Shape
This is about 30 minutes uphill hike from Calag-itan Fish Sanctuary. Don't worry! Parts of the road are paved and the rest is under construction. However, as of May 2018, only single motorcycles are able to reach the last leg of the journey. It offers a view to the heart-shaped or to the cynical, butt-shaped view of the Hinunangan coastline. There is an entrance fee and two separate places where you can camp overnight.


If you are adventurous, take my advice and go off the beaten track to experience the provincial life and discover the charms that give character to Hinunangan like ending up lost in the middle of towering coconut trees!


Tuesday, May 8, 2018

Hong Kong Disneyland Hacks


I just came back from Hong Kong Disneyland where I spent one magic filled day with my mini-me. Some people told me that one day in Disney is not enough to see and explore everything! However, with good planning, it is possible!


Starting from the Disney train, everything was a mad dash! Yumi had a fever the day before and when we were at Disneyland she was taking nothing per orem and was just vomiting liquid. However, we just made the best of the situation and enjoyed the day. So, if you are towing kids, better do Disneyland first.

Here are my tips on how to get the most out of HK Disneyland and experience all the rides and watch each of the promised shows and parades in one awesome day!

  1. Take the six-minute Disney Train ride from Sunny Bay station instead of the bus. It's more dramatic and it gets you pumped up for what's to come. Using your Octopus card, it will set you back 6.7HKD for adults and 3.4 HKD for children. 
    Nope, that is not a Mickey-shaped led TV! That is the window and those are the greeneries!
  2. Buy your open Disney tickets at Klook. First, you skip the long lines. Second, since it is an open day ticket you can pick out the best weather to go. Lastly, the price is way cheaper than buying the ticket on Disneyland online or at the park where the tickets sell at 4078PHP/79USD/619HKD for adults and 2994PHP/58USD/458HKD for children 3 to 11 years old. Meantime, the tickets were at 3440PHP/67USD and 2688PHP/ 52USD for children on Klook!
  3. Be sure to be in the park 30 minutes before the gates open. The park opens at around 10am. People would usually start queueing an hour early and once the gate is open, everyone seems to be running somewhere. You can spot the veterans because they have sit-upon with them.
  4. Check out the schedule for the day in the brochure and set alarms on your cell phone!
    Here's how ours looked like: 
    1. 10:00am  Photo with Mickey and Minnie
    2. 10:30am  Register for Jedi Training at Space Trader, Tomorrowland
    3. 10:35am  Go to Animation Academy, Main Street
    4. 12:00pm  Festival of the Lion King at Adventure Land
    5. 01:30pm  Flights of Fantasy Parade at Main Street
    6. 02:30pm  Jedi Training at Tomorrowland
    7. 04:30pm  Springtime Processional at Main Street
    8. 06:15pm  "Mickey and the Wondrous Book" at Fantasyland
    9. 07:30pm "We Love Mickey" at Main Street
    10. 08:15pm "Disney Paint the Night" at Main Street
  5. If you've got a stable internet, download the Hong Kong Disneyland App. The free internet is spotty and almost useless!
  6. Don't go on a Chinese holiday! Although Disneyland Shanghai has helped lessen the crowd, it can still get congested on holidays and weekends.
  7. Don't be shy. Ask for a sticker from the staff! 
  8. For the characters greetings,
    bring a pen and characters will readily sign your stuff! I've read that the characters would practice their signatures so that they'll look uniform throughout the different Disney sites.
  9. Buy a Disney Magical Goodie Bag for pasalubong if you have a previous purchase worth 350HKD!
    It is worth a bang for one's buck because the actual value is around 900HKD for a 200HKD bag. The downside is you'll get random, unpopular stuff but hey, it is worth it!
    Most of the stuff we got was from Star Wars and Duffy and Friends.
  10. Take advantage of fast passes you can get at the kiosks at Hyper Space Mountain, The Many Adventures of Winnie the Pooh and Iron Man Experience. This is the best way to skip the long lines but we didn't get to use ours though.
  11. Bring your own water bottle and some snacks. Food is a bit expensive. Here is how much things are in the park: 
    Brainwashed Yumi not to drink soft drinks because they are dirty water but now forcing her to drink some because she badly needs electrolytes after vomiting the whole day!
    1. Meal  790PHP/120HKD
    2. Medium sized popcorn 230PHP/35HKD
    3. Drinks 230PHP/35HKD
  12. Souvenir items are expensive as well.
    1. Mickey Bow Headband 1039PHP/158HKD
    2. Tshirt  1434PHP/218HKD
    3. Tsum Tsum 579PHP/88HKD
    4. Tumbler 579PHP/88HKD
    5. Pens 658PHP/100HKD


Don't miss the following:

  • Character greetings
  • Hong Kong Disneyland Railroad
  • Animation Academy
  • Mickey's PhilharMagic - 4D show
  • It's a Small World
  • Mystic Manor
  • Big Grizzly Mountain Runaway Mine Cars
  • Jungle River Cruise
  • Hyperspace Mountain
By the way, selfie sticks are not allowed and Sleeping Beauty Castle is under repair!

Written on May 5, 2018